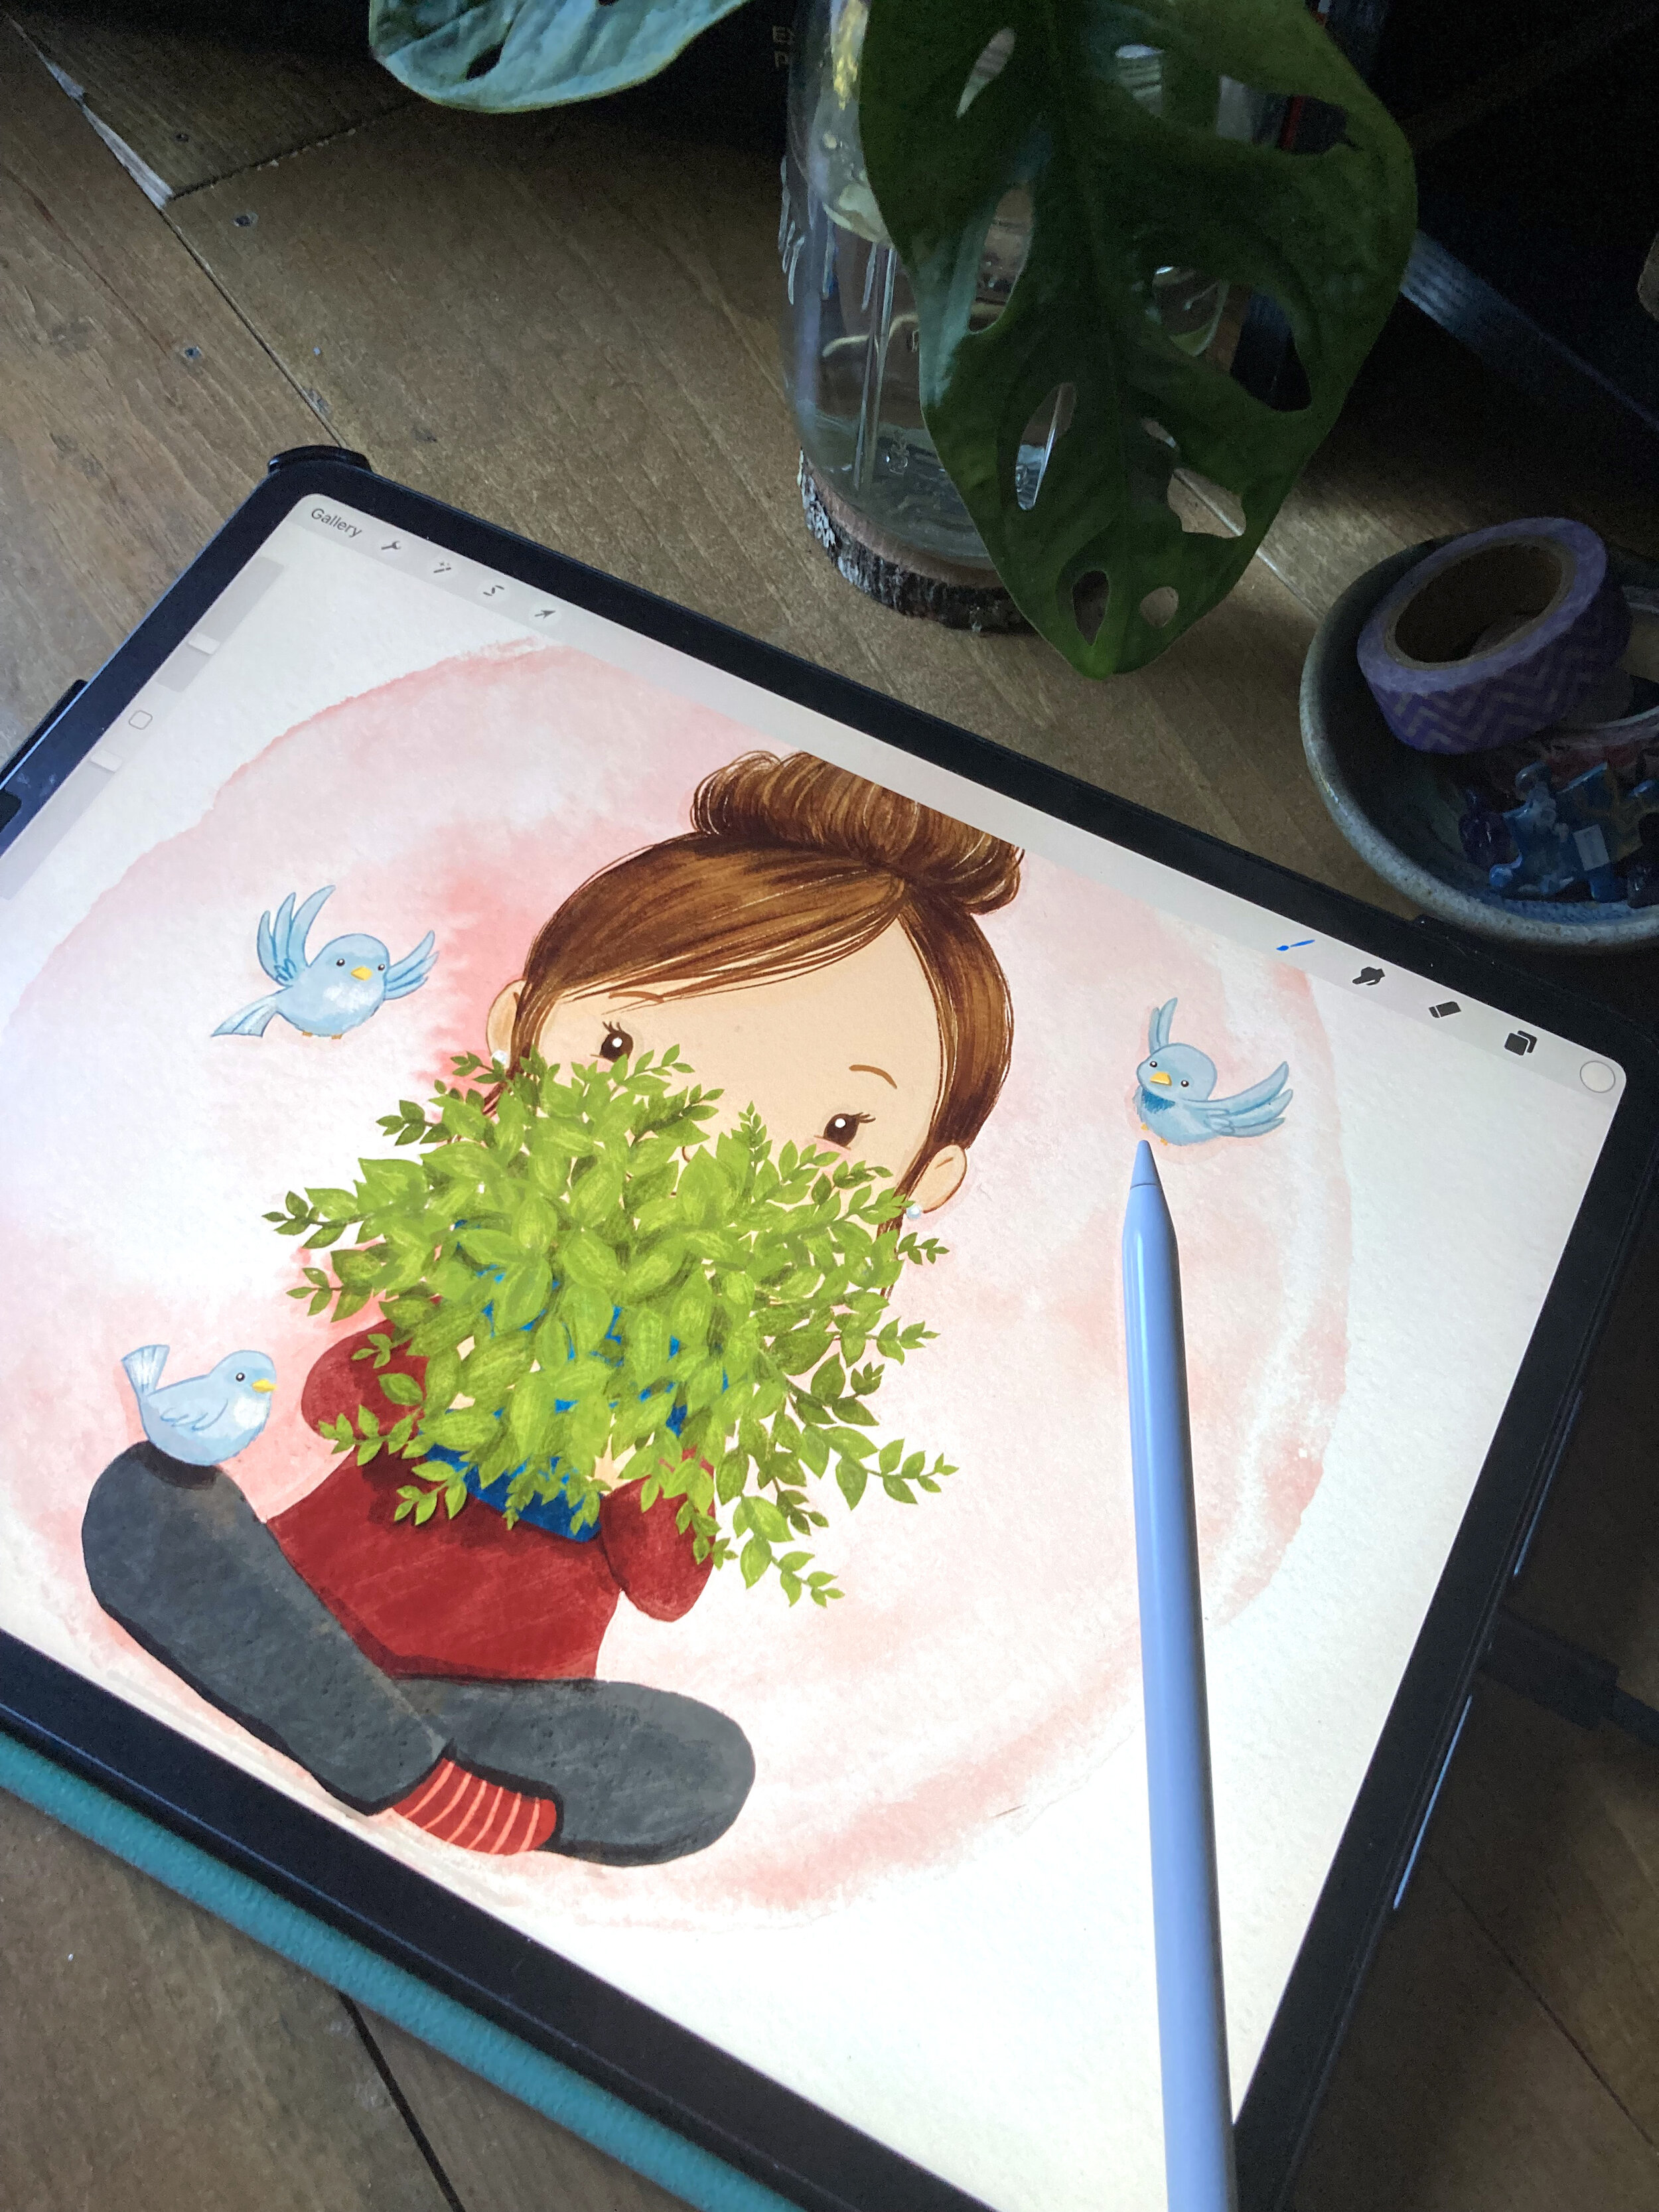
Artist Note: I currently use the iPad Pro, Apple Pencil 2nd Generation, and Procreate 5x.
Loved by creatives worldwide, if you own an iPad chances are you own Procreate, an amazing (and affordable) app with a 4.5-star rating on the App Store.
I challenged myself to more creative drawing time on the go and in the process, discovered new ways to streamline my process and flex my illustration muscles.
Whether you’re a Procreate newbie feeling overwhelmed by all the bells and whistles (it’s ok, just take it one step at a time) or you've spent time in the app but appreciate hearing about Procreate tips... then keep reading ‘cause I’ve got some goodies for you.
If you're a Procreate PRO feel free to share your own favorite tip in the comments below. I love hearing about new ways to use this fabulous app.
MY TOP PROCREATE TIPS
✔️ Quick Shape Command
I often take a hand-drawn approach with my art in Procreate but when I need a more perfect shape or straight line it's simple to create in this app.
✨ TRY IT OUT ✨
Draw a line and keep your Apple Pencil down on the iPad screen- if you don't lift the pencil, Procreate will adjust your hand-drawn line into a perfectly straight one.
Similarly, draw a circle with your pencil making sure that you connect the ends and keep your pencil down on the screen. Doing so allows you to resize the circle you’ve made. To create a perfect circle, hold three fingers down on the screen, and Procreate will snap your shape into a perfect circle.
✔️ The BEST thing about working digitally
It's not Command+Z but it has the same effect - simply tap and hold two fingers on the screen and Procreate will undo your last action. If you keep your fingers down, it will rapidly undo your most recent changes until you remove your fingers from the screen.
If you changed your mind about that Undo? Just touch the screen using three fingers.
HANDY TIP: For full-screen mode, touch your screen with four fingers - take it back by tapping with four fingers again.
✔️ Resizing objects + Interpolation
Procreate is a raster-based program (like Photoshop) meaning artwork is made of pixels, which can lose quality when resized or scaled up. When using the Transform tool, you can limit this loss of quality by adjusting the Interpolation settings.
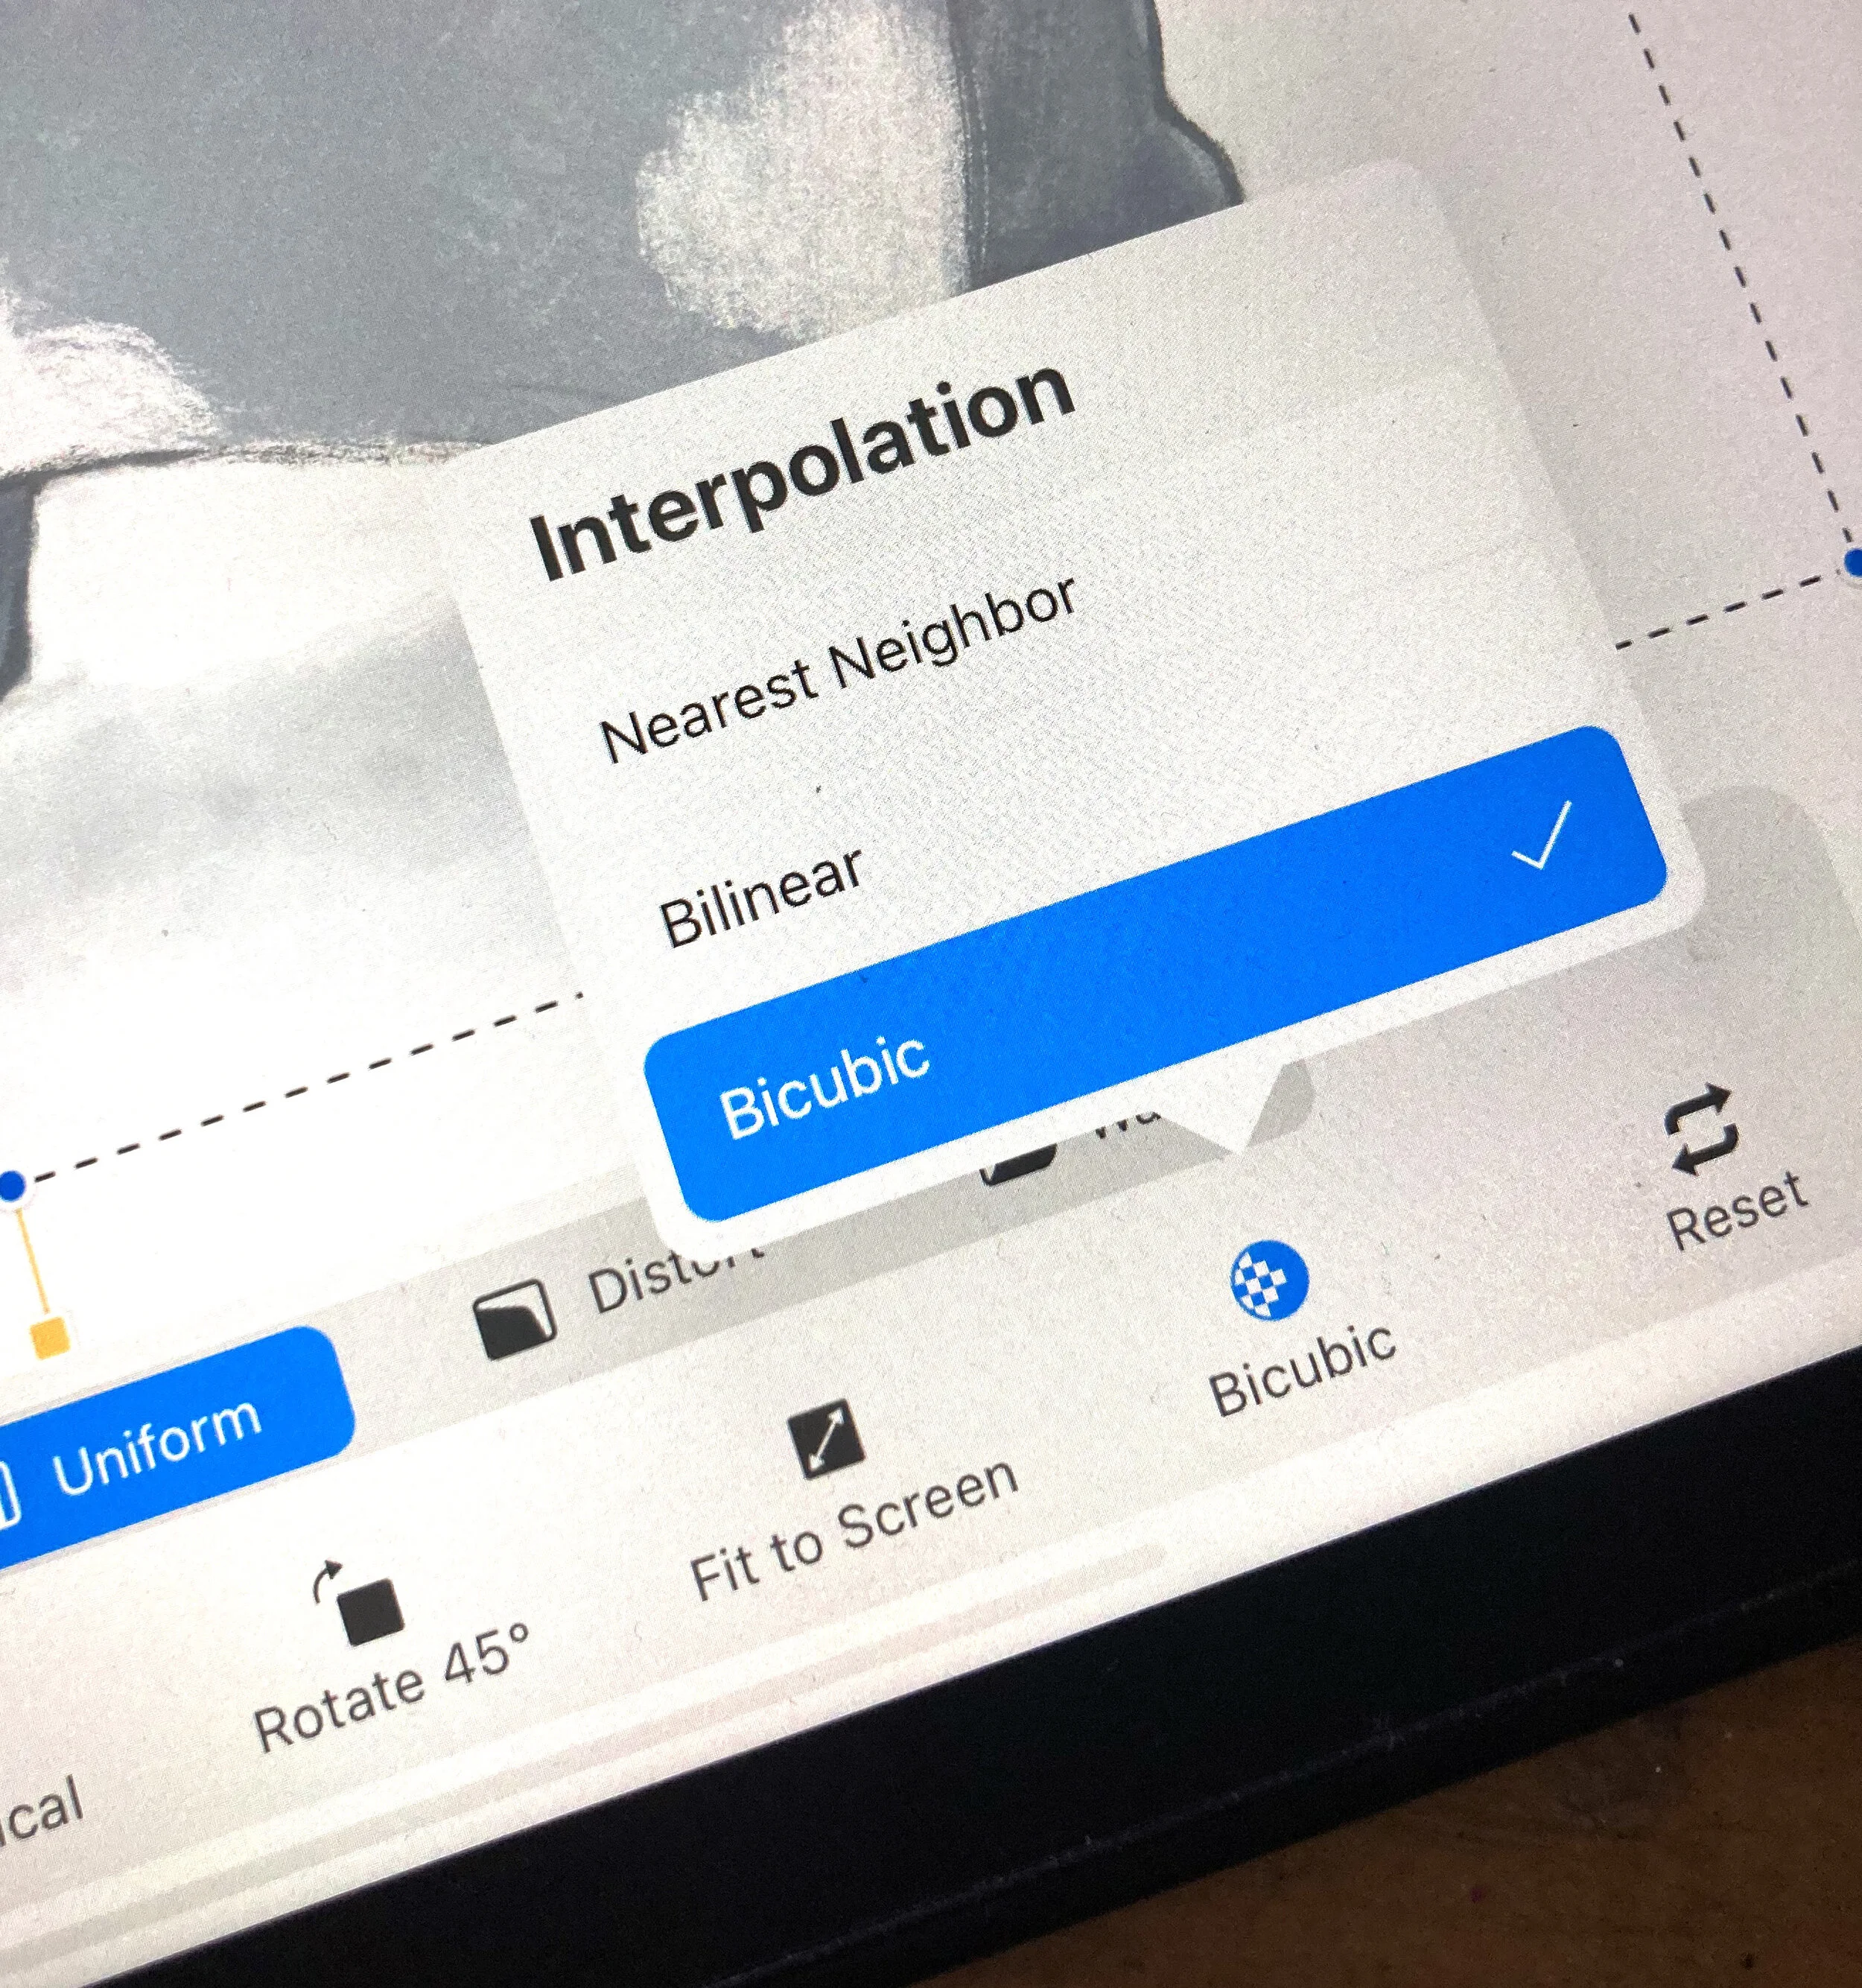
Interpolation is how Procreate figures out how many more (or less) pixels it needs to give the image to make a new size or shape. And, how those pixels position so the edges between different colors in your artwork stay as clear as possible. ... Every time you resize an image, the interpolation process happens again. (source: https://procreate.art/handbook/procreate/transform/transform-interpolate/)
When resizing objects in Procreate with the Transform tool, it's better to use the Bilinear or Bicubic option.
Click on the Transform tool (arrow) in the top menu
Pick how you want to resize your object (Freeform, Uniform, Distort, or Warp).
Click on the checkered circle, second to last on the right.
Select either Bilinear or Bicubic.
If you select the Bilinear setting when resizing your object, you’ll have smoother edges than you would with Nearest Neighbor.
Bicubic, is the best option, it will give you the cleanest result with the least amount of pixelation. NOTE: no matter the setting though, if you resize your object more than a few times, you will notice it begin to pixelate because... ultimately, it is a raster-based program.
✔️ Assisted Drawing, Symmetry.
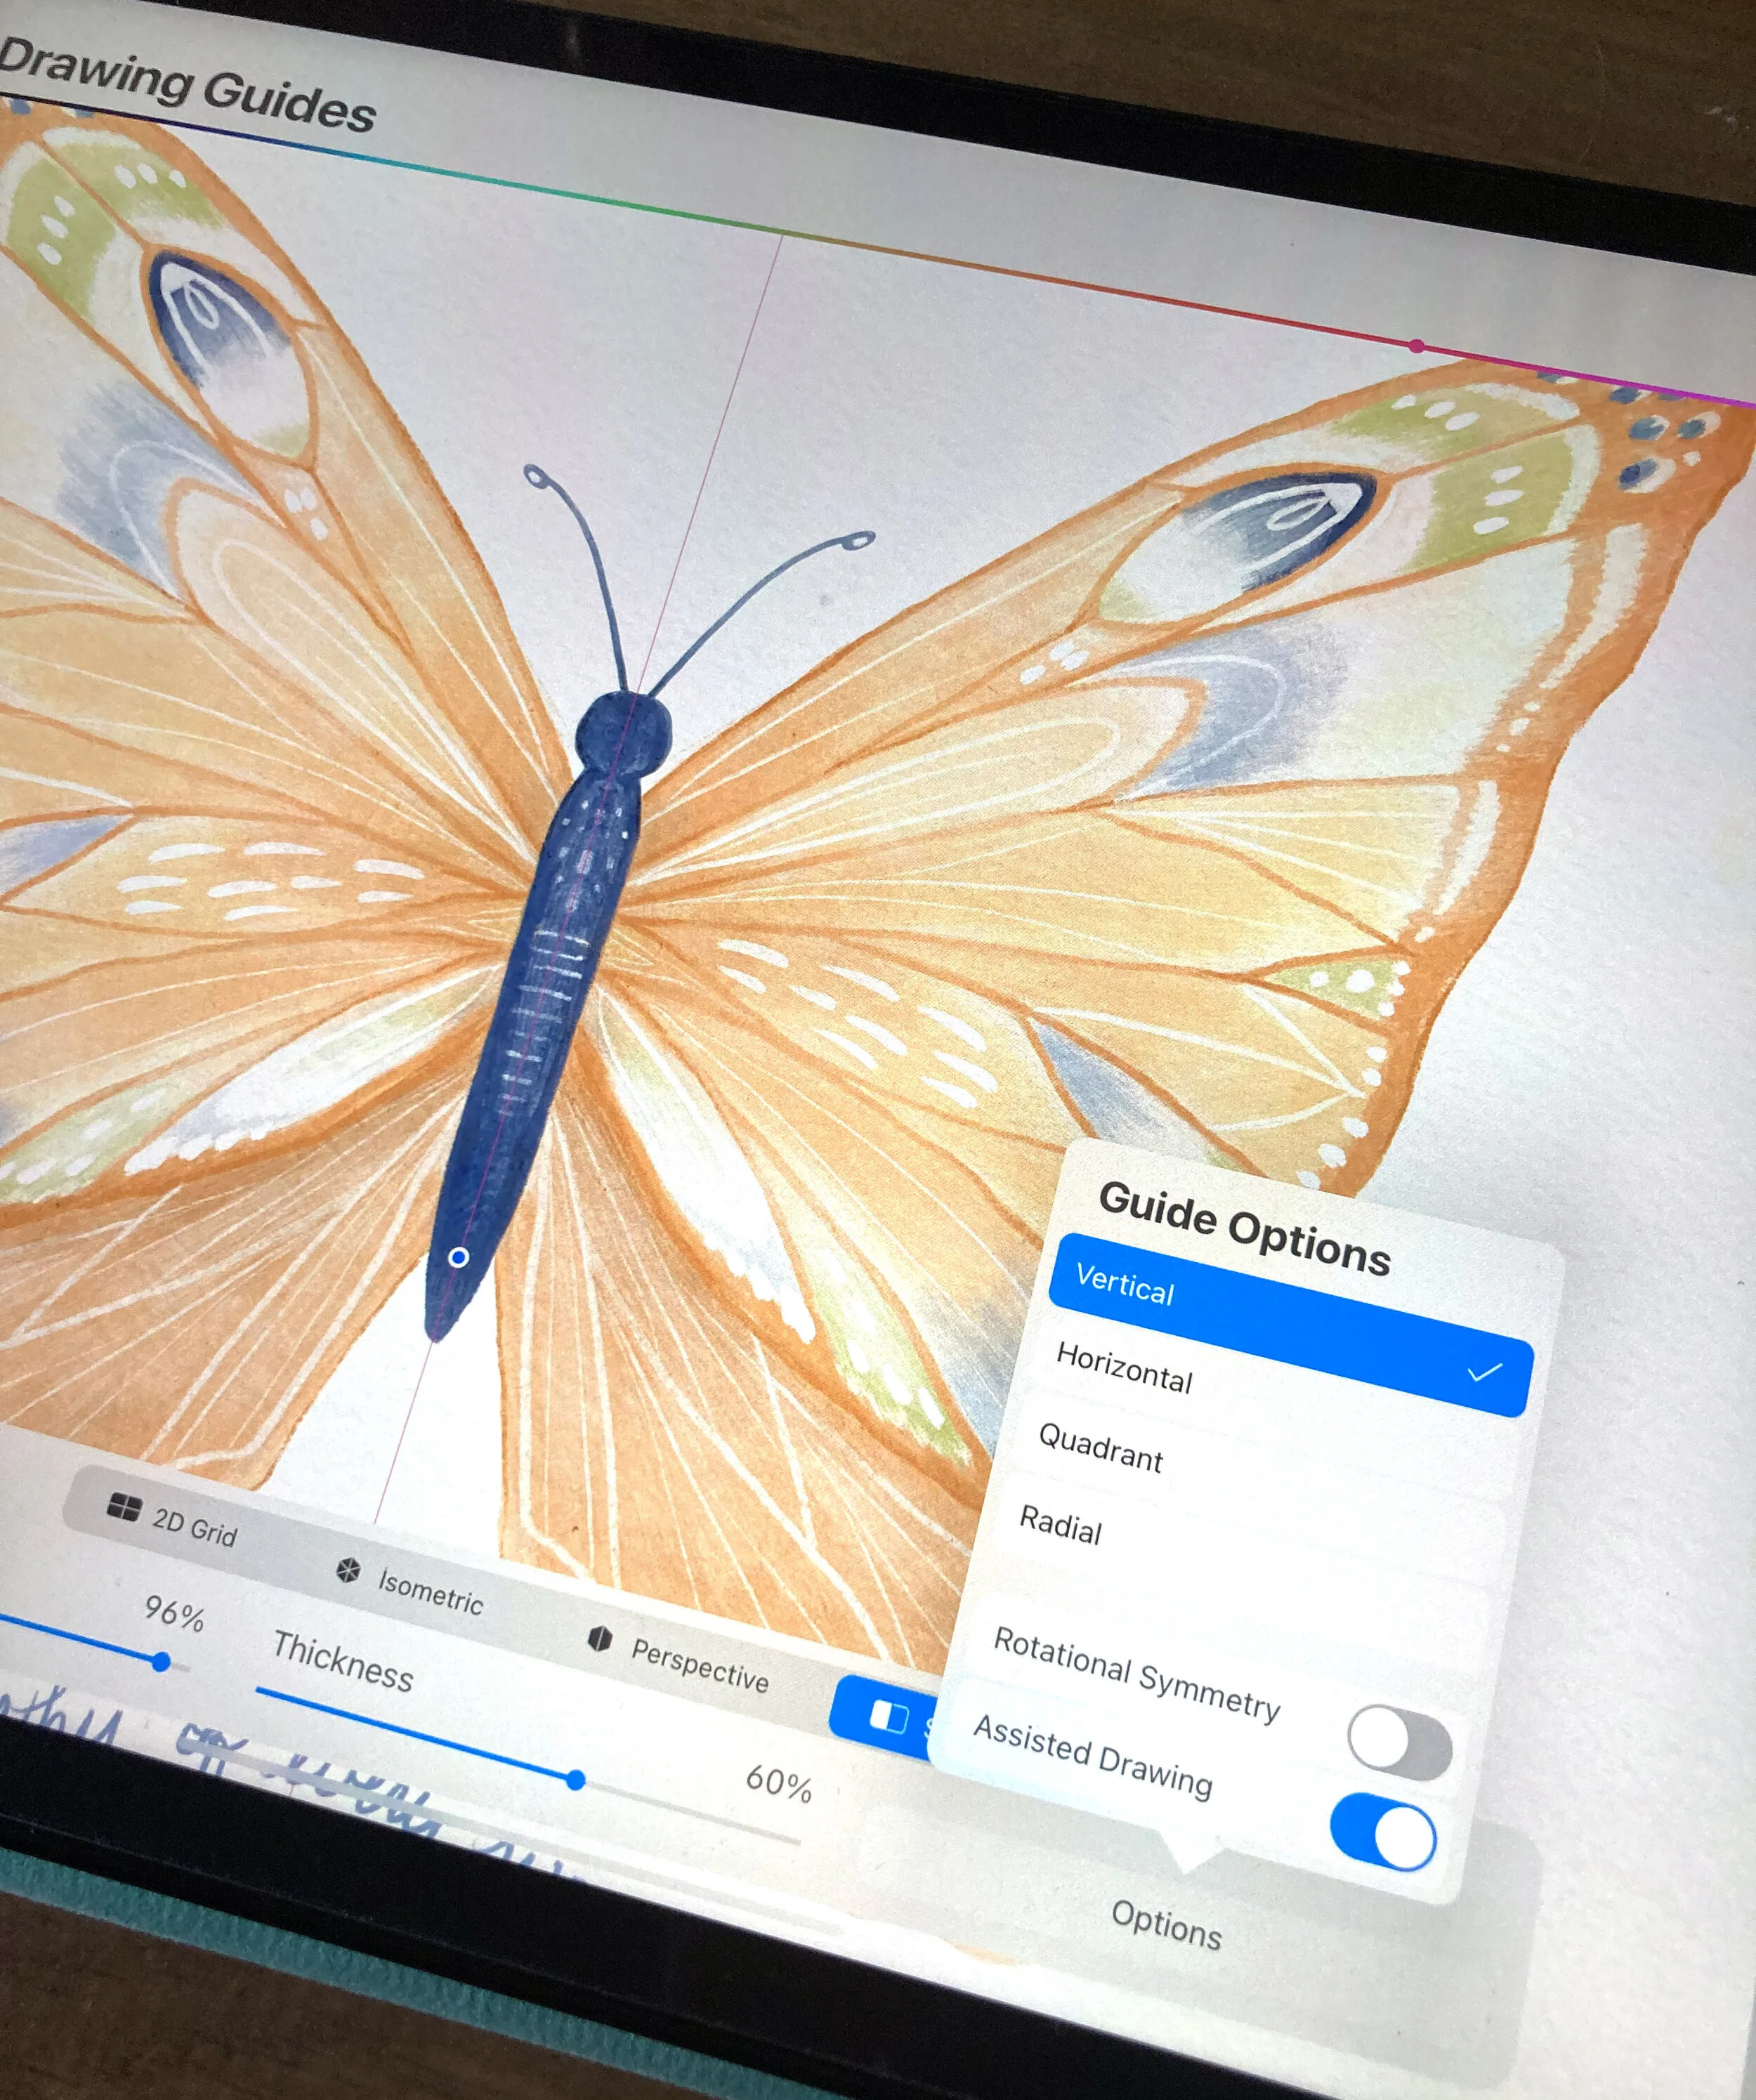
To turn on the Drawing Guide, tap on Actions (wrench icon) in the Procreate menu at the top. Select the Canvas icon, and you'll see the option for Drawing Guide. Toggle the switch on and then tap the Edit Drawing Guide to view the additional features of the guide.
Tap Symmetry at the bottom, the default option type is vertical but you can also try the others: horizontal, quadrant, and radial. Using the symmetry option you can quickly create flowers, butterflies, or folk art-inspired designs.
Horizontal symmetry is similar to vertical, but the axis is flipped. Quadrant symmetry divides the canvas into four equal sections (or quadrants). Radial symmetry is perfect for creating kaleidoscopes or mandala designs.
✔️ Adjustments
Discover ways to alter your image with Noise, Blur, Bloom, and Halftone effects... but let's focus on the COLOR because this feature can help you recolor parts of your illustrations with ease. This is handy when trying to create stickers in a variety of color ways, greeting card designs too!
✨ TRY IT OUT ✨
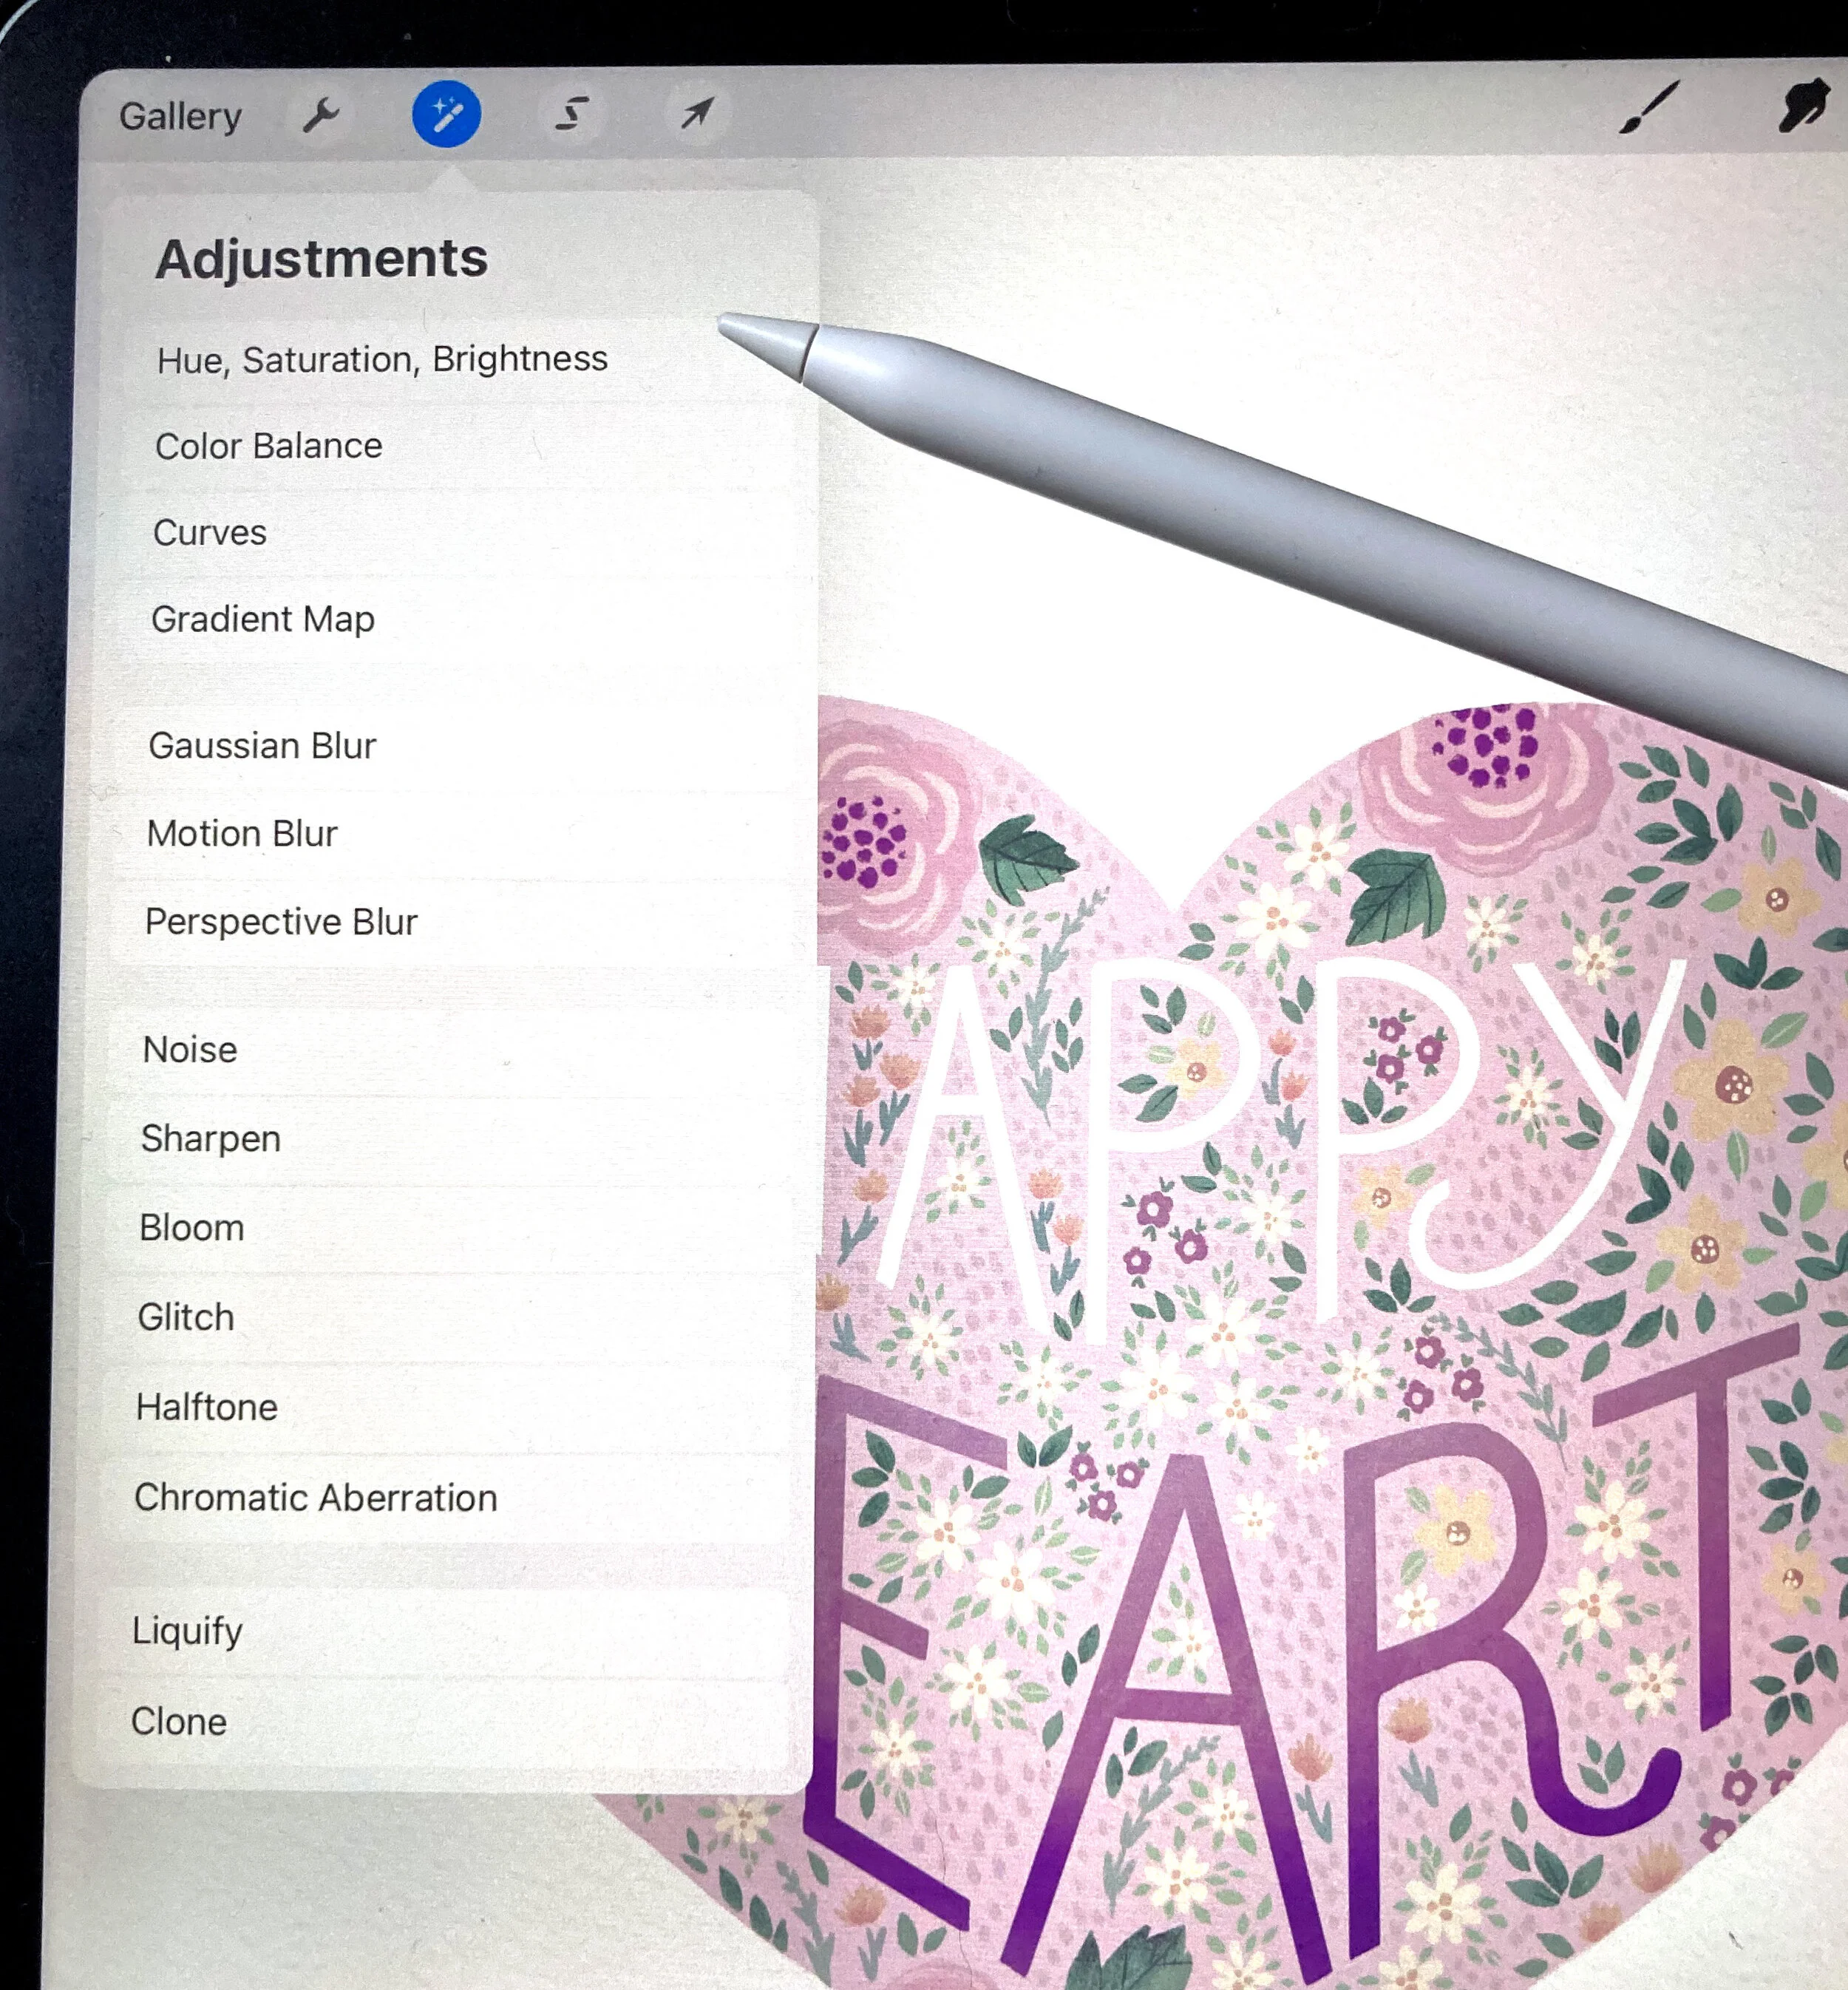
Select Adjustments (magic wand icon) and HSB (Hue, Saturation, Brightness), Layer
Three sliders appear at the bottom to allow you to adjust the color in your image. Hue is the overall tone. Saturations are the color intensity, move to the left for more gray and the right for more vibrancy. Brightness is the lightness + darkness of the art.
CREATIVE ADVICE: When I recolor an illustration, I create a duplicate of the canvas first. In the Gallery, tap Select, then pick the design you want to recolor and tap Duplicate. I prefer to work from a duplicate copy so that I still have the original file at my disposal.
✔️ Clipping Masks
Procreate has three mask options to pick from Alpha Lock, Mask, and Clipping Mask. I use Clipping Masks the most often as it is a great way to compose multiple layers non-destructively.
✨ TRY IT OUT ✨
Add a new layer (plus sign icon in layers menu), above an object/ illustration layer. Using a brush (your pick) and some brushstrokes to that layer and then select the Clipping Mask option from the flyout menu (tap and activated layer once and the menu will pop up). This function clips your current layer to the layer beneath it. Go ahead and play with color, texture, and effects on your clipped layer with Adjustments. If you don't like it, simply delete or turn off the layer.
CREATIVE ADVICE: Get in the very good habit of always naming your layers. Don't get bogged down toggling through an excess of layers to find what you need - that wastes precious time and can be frustrating. Organize your work with well-labeled layers to avoid any disruptions in your creative process.
✔️ Group Layers

I like grouping layers together so that my artwork stays tidy and organized.
Begin by selecting the layers that you want to group. Tap to select the first layer and then swipe right on all the other layers you want in that group. Once you have more than two layers activated a Group option will appear in the top corner of the layer menu. Click Group and Procreate will bundle them together. If you decide you want to separate a layer, simply click and drag it out of the group.
BONUS PROCREATE TIP: Reference Companion
This feature allows you to add a floating canvas to your screen to reference your work. Tap Actions (wrench icon) at the top of your screen and then pick Canvas and toggle on Reference.

A small window (reference companion) will appear. You can move it by dragging the handle at the top of the window, and resize it by touch, and pulling the bottom right/ left edge of the window. Pinch-zoom and move the image inside the Reference Companion window the same way as you would zoom and move on your canvas.

CREATIVE ADVICE: Keep your digital files organized in Procreate by stacking like content in the Gallery and labeling each stack appropriately. I color-code my stacks as well so that everything is not only coordinated but it’s cheery to look at. You can label it however you like, I hand-letter popular content on a color block then place it as the first item in each stack. IF you aren’t familiar with stacks, it is a way to organize your art. Simply press and hold on to a canvas then drag it over another canvas to create a stack.
Honestly, the more time you spend exploring Procreate the more at ease you’ll become. It’s an intuitive program, even more so if you’re familiar with Photoshop.
The more comfortable I felt drawing in Procreate, the more excited I became - popping it in my bag to sketch with while waiting for kids at school or during an extended road trip. As an illustrator, having the freedom to create from almost anywhere is not only convenient but quite fun too.
I hope these tips will help motivate you to spend more time playing in Procreate and supercharge your creative workflow in the process.